Showing posts with label vegetarian. Show all posts

Monday, February 6, 2017

Easy, healthy zucchini soup that can be served hot or cold!


I absolutely LOVE this recipe and it is one of the easiest recipes to make, which means it’s right up my alley!! I originally learned this recipe when I was doing Beachbody’s Ultimate Reset program (a 21 day food and supplement program to help you detox your body and restore it to optimal health). The Ultimate Reset program is absolutely awesome and more info about it can be found here: https://teambeachbody.com/shop/-/shopping/URComplete?referringRepId=183908).

I have used this soup recipe (and many others of the awesome recipes that come with this program!) ever since!!

The soup is vegan, gluten-free, and can be served hot or cold so it’s a perfect healthy meal for a cold winter day or a summer evening! Additionally, this recipe only takes about 5 minutes of actual labor time- how great is that?!

Ingredients:
2 medium-sized zucchini
¾ cup cashews
Himalayan sea salt
Basil (fresh or dried)
Bragg’s Liquid Aminos (soy-sauce substitute)- I’ll give alternatives down below if you don’t have this

Directions:
Cut up zucchini into chunks and steam until semi-soft (length of time for steaming will depend on size of chunks).

While the zucchini is steaming, soak the cashews in water to soften. Drain after about 10 minutes.

Throw the steamed zucchini and cashews into a blender. I think a Vitamix is the absolute best if you plan on making a lot of soups, especially with its variable speeds and tamper tool to help push/mix thicker concoctions. Here is the one I use: http://amzn.to/2lhHfb0 (disclosure: I get a small commission from Amazon if you buy this product). I’ve had this for years and it has never failed me- I always joke that it has the motor of a lawn mower haha- it’s a beast! For this particular soup though, since the zucchini is steamed and the cashews are soaked, everything should be soft enough that you shouldn’t have a problem using a regular blender.

Add Himalayan sea salt, basil, and liquid aminos to taste!

I’m gluten-free so that’s why I use Bragg’s Liquid Aminos instead of soy sauce. The liquid aminos can be found on Amazon here: http://amzn.to/2jqWfpj. Full disclosure: I get a small commission from Amazon if you buy this product but this is honestly what I use at home and they can be hard to find at grocery stores.

I go pretty heavy on these seasonings :)

Blend all of that together and enjoy! The recipe makes 3-4 servings.

Happy cooking!
Katelyn


I would be honored to help you with your health and fitness journey :)  Here is a link to sign up for a free account with me as your coach: https://www.teambeachbody.com/signup/-/signup/free?referringRepId=183908. Or you can go to www.teambeachbody.com, sign up for a free account, and enter any of my info in when it asks if a coach referred you: screen name: KatelynLesk, coach ID: 183908

You can contact me or find out more information using:
Or my Youtube Channel: https://www.youtube.com/kate37721

Disclaimer Copy: Katelyn Lesk is an Independent Beachbody Coach.

Tuesday, January 17, 2017

Easy, healthy spring rolls recipe and demo!


I was SO proud of myself when I made spring rolls the other day!!! I had always assumed they’d be messy or would fall apart, but when my friend, Lindsay, decided to have an Asian-inspired dinner party, I thought I would give them a try! Turns out, they were incredibly easy and they are a tasty way to get more veggies into your meals or party appetizers!

I give a full video demonstration here (and to prove how easy it was to make the rice paper rolls, I had to do it with one hand in order to film it!): https://youtu.be/97wWg5kH7BQ

The rolls were super simple to make. Fillings are totally up to you and your tastes. I made these rolls twice and each time I used some kind of combo of romaine lettuce, shrimp (I gave my recipe for shrimp with a little extra kick in the video!), thin rice noodles, avocado, red pepper, carrots, cucumber (all the veggies I either cut into thin strips or spiralized), mint (I loved the flavor that the fresh mint added so I used even more the 2nd time around!), and sesame seeds. The video explains all about the rice paper, what to look for when buying it, and how to prepare it for rolling!


The homemade peanut sauce absolutely MADE these rolls! They were good without it, but it added so much extra flavor, plus I liked having something “liquidy” on them. I apologize for not being the kind of cook who measures everything perfectly. With my background in the sciences, I do love things that are exact but unfortunately my cooking tends to be very free-spirited. I used multiple recipes online to come up with this concoction (so if you are someone who likes things exact, google a homemade peanut sauce recipe). I included a picture of what I used in the peanut sauce here since it was a little hard to see in the video. The main ingredients were basically peanut butter and soy sauce (I used liquid aminos- a healthier, gluten-free alternative to soy sauce- available from amazon associate link here- disclosure: I get a small commission if someone purchases from this link). Mash some peanut butter with some soy sauce (I used a hefty amount of each- more soy sauce will make it spicier, more PB will make it sweeter). Everything else I used to taste. I really liked the addition of the sesame oil- I felt like that gave it a good Asian flavor. The honey sweetened it up a little. I added some rice vinegar (I like what that did to the texture). Black pepper, hot sauce, garlic powder, actual garlic (minced), and red pepper flakes (not pictured) all added to the flavor but can be used generously, sparingly, or not at all depending on your tastes. When you mix all of this together, it will be pretty chunky and think. Add water (small amounts at a time) to thin it out to the consistency you want! Mine thickened a little in the fridge and I actually liked it even better the next day (just FYI).


I served the peanut sauce on the side (garnished with red pepper flakes) but it was so good, I ended up using it generously over each one of the rolls I ate!

This entire recipe is all gluten-free- just make sure you use a gluten-free soy sauce or an alternative like the liquid aminos that I used! The liquid aminos can be found on Amazon here: http://amzn.to/2jqWfpj Full disclosure: I get a small commission from Amazon if you buy this product but this is honestly what I use at home and wanted to make it easier for you to find!

If you are vegan and don’t eat honey, that can easily be taken out of the peanut sauce or substituted with agave or pure organic maple syrup.

If you don’t like or eat shrimp, don’t worry- I made a bunch of them without it and they were just as good!

Watch the video, let me know what you think, and let me know how yours turn out! Feel free to contact me with any questions!!

Happy cooking!
Katelyn


I would be honored to help you with your health and fitness journey :)  Here is a link to sign up for a free account with me as your coach: https://www.teambeachbody.com/signup/-/signup/free?referringRepId=183908. Or you can go to www.teambeachbody.com, sign up for a free account, and enter any of my info in when it asks if a coach referred you: screen name: KatelynLesk, coach ID: 183908

You can contact me or find out more information using:
Or my Youtube Channel: https://www.youtube.com/kate37721

Disclaimer Copy: Katelyn Lesk is an Independent Beachbody Coach.

Saturday, March 19, 2016

Healthy Shakeology Ice Cream!!!


I’m on vacation in Myrtle Beach with my parents. There’s something about being at the beach and on vacation with the fam that makes me want ice cream. It could be the fact that it’s everywhere you look around here (there was even a family with GIANT bowls of it in the elevator) or it could just be habit since we always used to go on a special family outing for ice cream at the end of every vacation as kids. I will most likely indulge in a treat as this vacation nears its end but in the meantime, I found a SUPER healthy alternative that actually might be even better than REAL ice cream (plus I feel GREAT after eating it- not bloated or on a sugar high)!


Here’s how to make it!


I blended all of the above together (except the toppings, of course) but in retrospect, I would have added the ice progressively. I think that would have made it easier to blend (I had to keep mixing it up with a spoon to get the ice to get down near the blades since the mixture was so thick). UPDATE: That method did work better when I made it the next night!


All in all, this turned out GREAT! Totally satisfied my ice cream craving!! BONUS: it’s HEALTHY! No added sugars, no artificial flavorings/colorings- all good stuff! One scoop of Vegan Chocolate Shakeology is 170 calories and the frozen blueberries I added were about 30 calories. I got this HUGE bowl out of it! Most commercial ice cream is between 200 and 300 calories for a teeny tiny ½ cup serving (plus you get a boat load of sugar and fat with that)!!


I feel great and my body and digestive system are very happy with my healthy decision! I might not need that treat at the end of vacation after all :)


My personal story of the benefits I’ve seen with shakeology can be found here:
*These statements have not been evaluated by the Food and Drug Administration. This product is not intended to diagnose, treat, cure, or prevent any disease*
Similar healthy treats using Shakeology can be found here: http://katelynlesk.blogspot.com/2016/10/healthy-chocolate-shakeology-candy-and.html!
Enjoy!!!
Purchasing info: http://www.teambeachbody.com/shop/-/shopping/MDSUSH311G?referringRepId=183908
UPDATE: My mom and I made our Shakeology treats for the 2nd night in a row- I think I am now addicted! :-D


I would be honored to help you with your fitness journey :)  Here is a link to sign up for a free account with me as your coach: https://www.teambeachbody.com/signup/-/signup/free?referringRepId=183908.

Disclaimer Copy: Katelyn Lesk is an Independent Beachbody Coach.

Thursday, January 14, 2016

Juicing vs Shakeology

I wrote this post on my health and fitness page (www.facebook.com/coachkatelynlesk) back in October of 2013 but I’ve had a lot of people asking me about this topic lately, so I decided to repost it on my blog! Here’s my update: I rarely make my green juice anymore- it became too time-consuming and costly and I had a tough time keeping up with it the process of going to the grocery store every 4-5 days, cleaning my veggies immediately (so I’d be more likely to make my juice) and using them all before they went bad. I still enjoy it when I do but I’m more likely to pay a premium for the convenience of buying it from time to time at a local cafe’ (which isn’t cheap- my favorite “clean green” juice is $11 per glass)! So Shakeology is even more of a hands-down winner these days (especially at about $4 per glass)!! If you’re interested in trying it out for yourself, you can check it out here: http://www.teambeachbody.com/shop/-/shopping/MDSUSH311G?referringRepId=183908 OR, I recommend going with this Beachbody on Demand Challenge pack for $10 more (http://www.teambeachbody.com/shop/-/shopping/DigitalCPUS?referringRepId=183908) which also gives you 3 months of access to our online streaming workout programs, which lets you try out any of the fitness programs in our collection!


My original post:


GREEN JUICE VS. SHAKEOLOGY. This is long but I get a LOT of questions on this so I tried to spell out all the details and things to consider.


One of the most common things I get asked about is how Shakeology compares to juicing (or other do-it-yourself versions). It’s actually the only thing I’ll ever use to make a direct comparison with shakeology because it’s the only thing I know does not contain any artificial ingredients b/c you’re in control of what goes into your blender (assuming you’re buying organic).


If you’ve been following my recent posts, you know that I’m now doing both. I’ve been making green juice each week to drink in the mornings and still drinking my shakeology every afternoon. So, as for the most important thing (HEALTH!) I think both drinks have an extraordinary amount of value. I think the shakeology is more complete- it has such a wide variety of plants, roots, fruits, PLUS pre- and pro-biotics; it’s paired to help give you the best absorption of all of the nutrients; the ingredients come from all over the world and are included in shakeology because they’re known to have incredible anti-inflammatory/anti-cancer/cholesterol lowering properties (and more!), they’re also known to have such a dense concentration of nutrients and are grown in soil that I believe to be more nutrient-rich than what we have here; etc. But I think variety is good for you (which is why I wanted to give the green juice a try), they both taste delicious, and they’ve become an important part of my day and wellness routine.


So anyways, in the big picture, I think they’re both FANTASTIC, but I’ll break down some of the other logistics involved (a lot of which I didn’t know until trying it out myself) just to give you an idea of the pros and cons of both.


- HEALTH PERKS. I have KNOWN experience of the incredible benefits of shakeology. I have customers whose blood sugars have been reduced, my own personal cholesterol was drastically reduced in the first 4 months I was on it (watch this video here https://youtu.be/ndsvEcPP7XU or check out the picture section of www.facebook.com/coachkatelynlesk for my results), weight loss, increased energy, etc. But I also don’t think anyone is going to argue that drinking a green juice full of leafy greens, veggies, lemon, and apple wouldn’t be extraordinarily beneficial to your health as well.
*These statements have not been evaluated by the Food and Drug Administration. This product is not intended to diagnose, treat, cure, or prevent any disease*


- CONVENIENCE. Shakeology is the hands-down winner here. Dear God, that green juice is a pain in the butt. It requires me going to the grocery store every week (and not just any grocery store- a store that has all my ingredients in organic form) AND it was a 2+ hour project until I invested mucho dinero $$$ into a top-of-the-line Vitamix blender and even then there’s still a lot of prep time (washing and cutting veggies) and clean-up time. Shakeology is super easy to make: powder + liquid (usually I just use water), mix in a glass and drink. It’s easy to travel with (we even have individual serving-size packets). I can make it at work without annoying the crap out of my coworkers (literally got yelled at when I turned my Vitamix on at work yesterday- had to take it into the lab haha)


- TASTE. Both are great (granted, I do think my green juice tastes like a lemony flavored salad, but I find it extremely refreshing for some reason). If you don’t like either of them, pinch your nose and choke it down anyway b/c you know it’s good for you wink emoticon


- COST. We all know the price tag on shakeology can be a little bit of a shocker at first ($130 for 30 meals/servings). I’ve used it long enough to know it is worth every penny and more but still, I can understand why people gasp a little when they think of paying all that money at once. However, the good news is that it actually breaks down to ~$4 per shake, which isn’t too bad, and we frequently have sales/discounts if purchased with one of our workout programs, which makes it much more justifiable. BUT, if you think that’s bad, wait until I tell you how much I’ve spent on my green juice over the past 2 wks. Here’s the breakdown:
- $60.50 at Whole Foods last week and $66.20 at Giant Eagle this week and this was only enough for my WORK-week (about 5 shakes- not every day). That means I’ll be averaging about $250 per month just in ingredients. And remember, I’m not adding flax, chia, protein powder, or any other supplements. There’s also the risk of wasted money if your produce goes bad before you can use it
- $427.99 on my Vitamix blender (and that includes a 20% off coupon). Yes, I know this is exorbitant, but trust me, it only takes one time of fighting with a normal blender for hours to purée your kale and you can see the value in a blender of this quality. I knew that either my blender would break or I would be too frustrated to ever actually make it because realistically, how often do we have a 2+ hour chunk of time that we can dedicate to shake making??
- Not to mention the value of my time in making these shakes, trips to the grocery store, etc (and we all know our time is valuable, right?!)


So all in all, based on cost and convenience, if I had to pick one, my winner would without a doubt be shakeology. I love it. And I’m so grateful for finding it (I know that sounds weird, but it’s true). But I also enjoy my green juice too! I like the feeling of making something so healthful myself and like I said, it’s already become an important part of my wellness routine. The bottom line is that healthy foods aren’t always cheap. But I can’t think of a better thing to spend your money on than an investment in your long-term health and happiness and quality of LIFE!! Whatever you choose (and remember- you don’t have to choose! or you can mix it up! whatever is best for YOU!), CHEERS TO GOOD HEALTH!!!!


Bottoms up, friends!!!


*These statements have not been evaluated by the Food and Drug Administration. This product is not intended to diagnose, treat, cure, or prevent any disease*


I would be honored to help you with your fitness journey :)  Here is a link to sign up for a free account with me as your coach: https://www.teambeachbody.com/signup/-/signup/free?referringRepId=183908. Or you can go to www.teambeachbody.com, sign up for a free account, and enter any of my info in when it asks if a coach referred you: screen name: KatelynLesk, coach ID: 183908

Disclaimer Copy: Katelyn Lesk is an Independent Beachbody Coach.

Monday, January 11, 2016

Fancy, healthy, delicious recipe: lemon garlic broccoli with bacon and scallops

I try new healthy recipes fairly often but now that I’m a full-time online health and fitness coach (meaning I work from home) AND the weather and Pittsburgh is getting colder, I wanted a way to ensure I had a reason to get my butt to the grocery store every week (last winter was freezing so it was hard to motivate myself to leave my house for non-essential errands… like getting food haha). So… one of my New Year's resolutions was to try a new healthy recipe at least once every 2 weeks! The recipe I picked out this week was from my Inspiralized cookbook by Ali Maffucci: lemon garlic broccoli with bacon. And since I’ve always wanted to learn how to make my own seared scallops and they seemed like a great accompaniment for my broccoli, I decided to make those too!

My definition of what I consider to be healthy foods has changed and evolved throughout the years based on the latest research as well as how my body responds to certain foods and the needs of my lifestyle. I used a lot of healthy fats in this recipe (yes, including butter, which I spent majority of my life avoiding!) and bacon. I am super careful that anytime I am eating healthy fats/meats like this, I buy the REALLY high-quality versions (meats and butter that come from grass-fed, hormone-free organically-raised animals; the bacon is organic and nitrate free as well; any oils I use are all organic). But if your definition of “healthy” varies from this, you can easily omit the meat and replace the butter with olive oil.

One of the things that I LOVED about the broccoli recipe was that it also showed me how to use the stems, which I normally throw away even though I hate wasting them! I used my Vegetti to turn the long broccoli stems into “broccoli pasta.” For tips on how to use a veggie spiralizer, you can watch my demo of zucchini pasta here: https://www.youtube.com/watch?v=uY5w3dHoyL0.


For the broccoli dish:
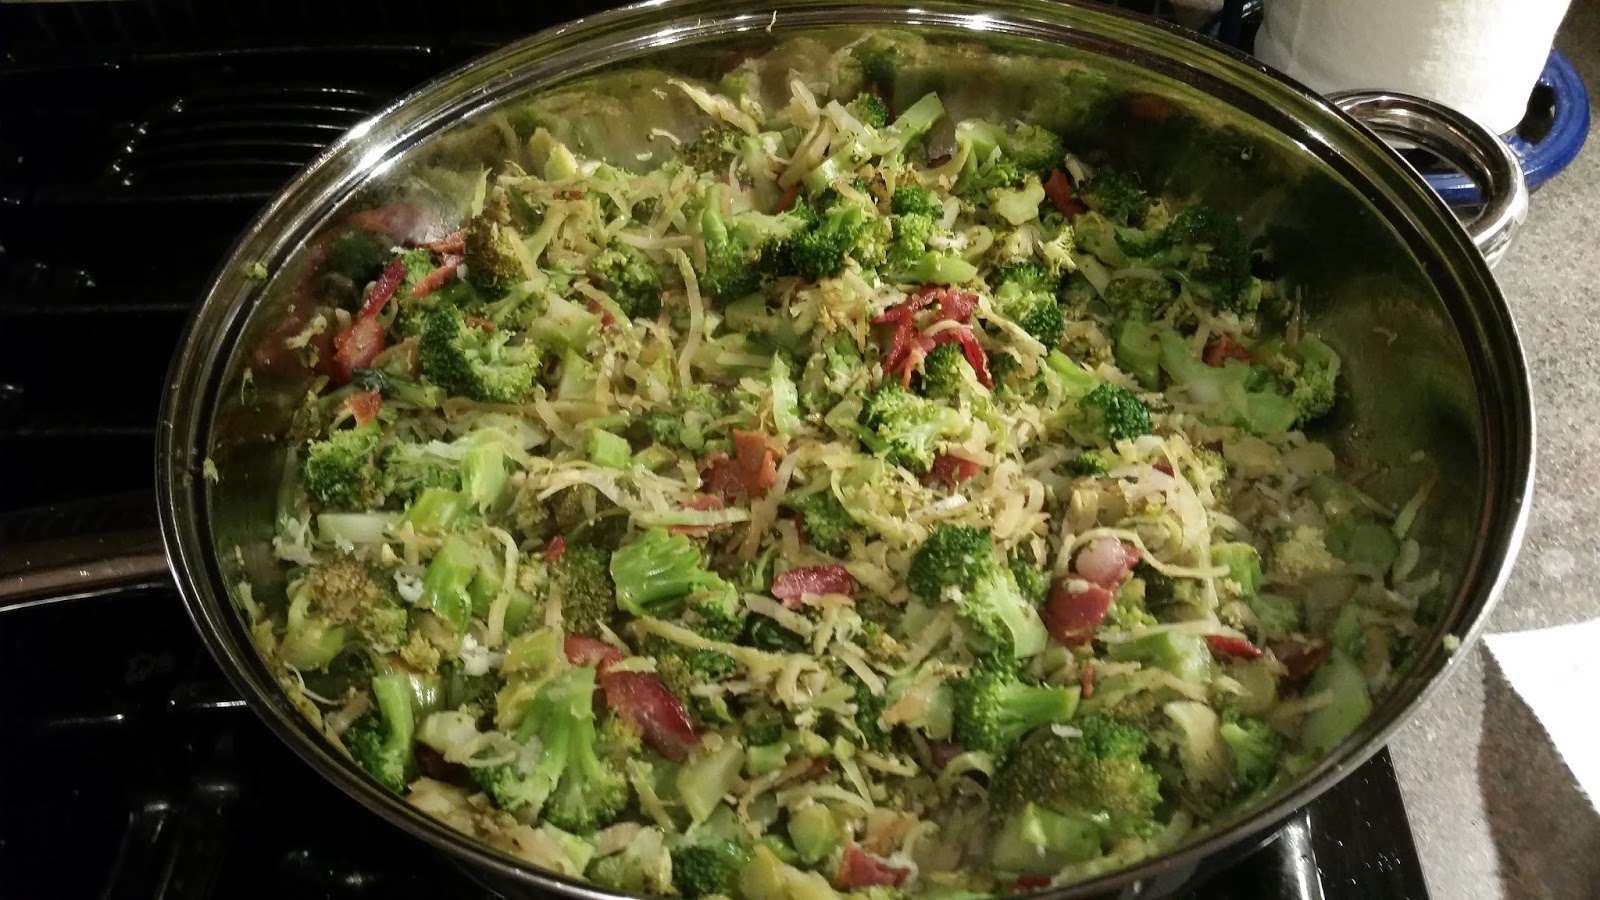
I chopped up the broccoli (3 large heads) and spiralized the stems. Meanwhile, I brought a saucepan (about half full of water with some Himalayan sea salt added) to a boil. I added the broccoli to the boiling water and cooked until tender. The next time I make this recipe, I will use a steamer instead. I like the texture of steamed veggies better (plus you preserve more of the nutrients)!

While the broccoli was cooking, I used a skillet to start cook the bacon (about 8 pieces cooked in olive oil for a few minutes on each side, until desired crispness). I removed the bacon from the skillet once cooked and set it on a paper towel-lined plate off to the side. I drained some of the excess oil from the skillet but didn’t clean it (I figured the remaining oil and bacon grease combo would give the dish some extra flavor and it did)!

Next step was to add the cooked and drained broccoli to the skillet over medium heat, along with some Himalayan sea salt and pepper, about 4 cloves of minced garlic, and the juice from 1 small lemon. When the broccoli mixture was cooked to desired texture (about 5 minutes), I added in the bacon (cut or ripped into small pieces) for another minute or so.

Voila’! I rarely measure things when I cook (hence the lack of exact specifications in this recipe) but I promise this recipe is super flexible and can be adjusted for your own tastes. Exact measurements not necessary :)

For the scallops:

I have always been told scallops are really easy to make- they were BEYOND easy. Makes me question why I pay so much for them in restaurants haha! I got fresh, never-frozen, wild caught scallops from Whole Foods- they were unbelievably delicious.

To cook them, I used the same pan the broccoli and bacon had been in for extra flavor (although honestly I think the majority of the flavor comes from the butter the scallops are cooked in). Even though the pan had some remaining oils from the broccoli and bacon dish, I melted some grass-fed butter in the pan- enough to coat it. I spread out the scallops in the pan and then added a small pat of butter on top of each scallop (recommendation from a friend). When I could tell the bottoms were getting crispy, I flipped them over (the pat of butter goes with it and the other side cooks in that). Again, no exact specifications. I think I had it on medium-high heat and cooked for about 2 minutes on each side. I could tell when they were ready by pressing down on them with the spatula- I was able to notice when they started to firm up.

I’m so glad I made the broccoli dish and scallops together- it was a great combination meal! Cheers to the first new recipes of the year! I hope you enjoy!


I would be honored to help you with your fitness journey :)  Here is a link to sign up for a free account with me as your coach: https://www.teambeachbody.com/signup/-/signup/free?referringRepId=183908. Or you can go to www.teambeachbody.com, sign up for a free account, and enter any of my info in when it asks if a coach referred you: screen name: KatelynLesk, coach ID: 183908


Disclaimer Copy: Katelyn Lesk is an Independent Beachbody Coach.

Wednesday, November 18, 2015

Zucchini Pasta with Homemade Sauce

One of my favorite recipes! Growing up, I always assumed pasta sauce HAD to come from a jar, or at the very least, be made using canned tomato paste. I love this recipe because I can control exactly what’s going into my sauce (no added sugar like most jarred pasta sauces, including organic ones) and the flavor is absolutely incredible! The sauce recipe is based loosely on a recipe from my beloved Kris Carr’s, “Crazy Sexy Kitchen” cookbook, which is amazing!!

Ever since going gluten-free in August of 2014, it’s been great to have this recipe that makes me feel like I’m still eating some of my favorite foods. In fact, I like it BETTER! And I feel great at the end of the meal (not stuffed like after wheat-based noodles). Delicious and nutritious!

I typed the recipe below but full demo can be found on my YouTube channel:

Zucchini Pasta and Homemade Sauce
Serves 4

Pasta:
3-4 medium zucchinis (thin works best if using a Veggeti)
minced garlic (optional)
1 Tbsp extra virgin olive oil


Use a Vegetti (or other veggie spiralizer) to make zucchini noodles
Add olive oil (approx 1 Tbsp) to a pan over medium heat
Optional: add minced garlic to the pan
Saute' zucchini noodles to desired noodle texture
If there is extra liquid in pan (from the zucchini), drain noodles

Sauce:
1 Tbsp extra virgin olive oil
minced garlic (optional)
1/2 medium onion cut into chunks (optional)
3-4 fresh tomatoes, cut into chunks
spices such as red pepper flakes, oregano, Himalayan sea salt, pepper
fresh basil (optional)

Add olive oil to a pan over medium heat
If using garlic and/or onions, add to pan for 2-3 minutes until onions are translucent. I also add some red pepper flakes to the pan at this time to release extra flavor
Add tomatoes and desired spices (I go heavy on the oregano and I also add additional red pepper flakes if I'd like it to be extra spicy)
Reduce heat to low and simmer for 30-35 minutes, stirring occasionally to prevent sticking/burning
Add additional spices as needed
Time of cooking depends on desired consistency. I like my sauce to be really thick so I usually simmer it for about 40 minutes
The last 2-3 minutes of cooking I will add fresh basil if I have it

Pour sauce over veggie pasta, add Parmesan cheese if desired, and enjoy!!